
cast iron · cookware care · kitchen cleaning
Cleaning Cast Iron Cookware Without Losing Seasoning
Most cast iron problems start at the sink, not the stove. Here's how to clean a skillet after everyday cooking, choose between brushes, chainmail and salt, handle burnt-on residue, and recover a pan from rust.
In this guide
- What You're Protecting When Cleaning Cast Iron Cookware
- The Everyday Routine: Wipe, Rinse, Dry, Oil
- Soap, Salt and Scrubbers: Choosing the Right Amount of Force
- Stuck-On and Burnt Residue
- Rust: Diagnosis and Recovery
- Drying, Oiling and Storage Habits That Prevent Problems
- Common Mistakes and How to Fix Them
- Fitting Cast Iron Care Into Your Cooking Routine
Cleaning cast iron cookware worries a lot of cooks because the advice conflicts. One source says never use soap, another says soap is fine, and a third suggests a pantry remedy. The goal is actually simple. You want to remove food without damaging the thin layer of baked-on oil that makes the pan resist sticking and rust. Once you understand what that layer is and what harms it, most of the rules make sense, and you can stop worrying about every wash.
This guide covers the everyday routine, how to choose a scrubbing tool, how to handle stuck-on residue, how to deal with rust, and the habits that stop most problems before they start.
What You're Protecting When Cleaning Cast Iron Cookware
Bare cast iron is reactive metal. The dark, slightly glossy surface on a used pan is seasoning: oil that has been heated until it bonds to the iron as a hard coating. Lodge describes seasoning as a protective layer of carbonized oil. Without it, the iron is open to rust. Lodge also notes that even a well-seasoned pan can rust if it's left to soak, put in the dishwasher, left to air dry or stored somewhere damp (Lodge Cast Iron).
So every cleaning decision is really about two questions:
- Does this remove food without grinding away seasoning? Abrasion is the main mechanical risk.
- Does the pan end up dry and lightly oiled? Moisture left on the surface is the main chemical risk.
Field Company frames it this way: the point of washing isn't only to get the pan clean but to prepare it for more seasoning. Regular cooking followed by a thin coat of oil gradually improves the surface (Field Company). With that in mind, a light film of oil left on the pan isn't a cleaning failure. A dry, bare-looking pan that sits in a humid kitchen is more of a concern.
Why the advice conflicts
Much of the disagreement comes from different starting points. Mississippi State University Extension tells new owners to skip soap and steel wool and to clean with water and a towel once the pan has cooled (MSU Extension). That cautious approach suits someone who is still building seasoning. Manufacturers whose pans arrive pre-seasoned are more relaxed about occasional soap. Both approaches agree on the parts that matter most: don't leave the pan submerged, always dry it fully, and oil it lightly afterward.
The Everyday Routine: Wipe, Rinse, Dry, Oil
Most cast iron needs the same short routine after a typical meal. Use more force only when the pan actually needs it.
1. Start with the least invasive step
If you cooked something simple and the pan just looks greasy, a paper towel or cloth wipe may be all it needs. Field Company recommends wiping out the grease first and stopping there if no food residue remains (Field Company). This works well after searing, toasting or shallow frying, where little sticks.
2. Rinse and scrub briefly
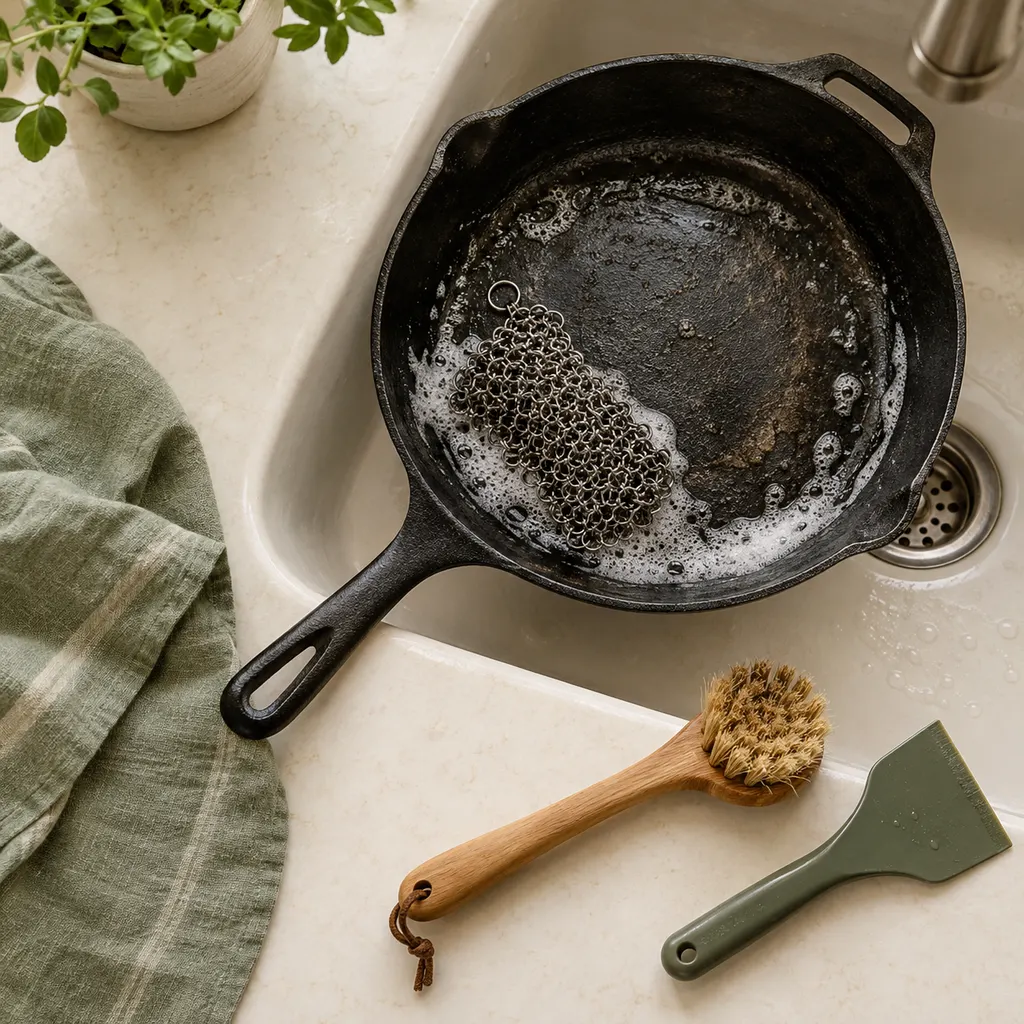
If bits remain, rinse the pan with warm water and work them loose with a firm brush, a chainmail scrubber or a non-scratch sponge. A short rinse or a soak of a few minutes is fine. Overnight soaking is what causes rust (Field Company). Keep the water time short and focus on the dirty areas rather than scrubbing the whole surface.
3. Dry completely, then add a little heat
Towel-drying alone often leaves moisture in the pores of the iron, especially on the rough exterior and around the handle. Lodge suggests putting the pan on a low burner for a few minutes to make sure it's completely dry (Lodge Cast Iron). The pan is ready when no damp patches show and the surface looks evenly dry.
4. Wipe on a thin coat of oil
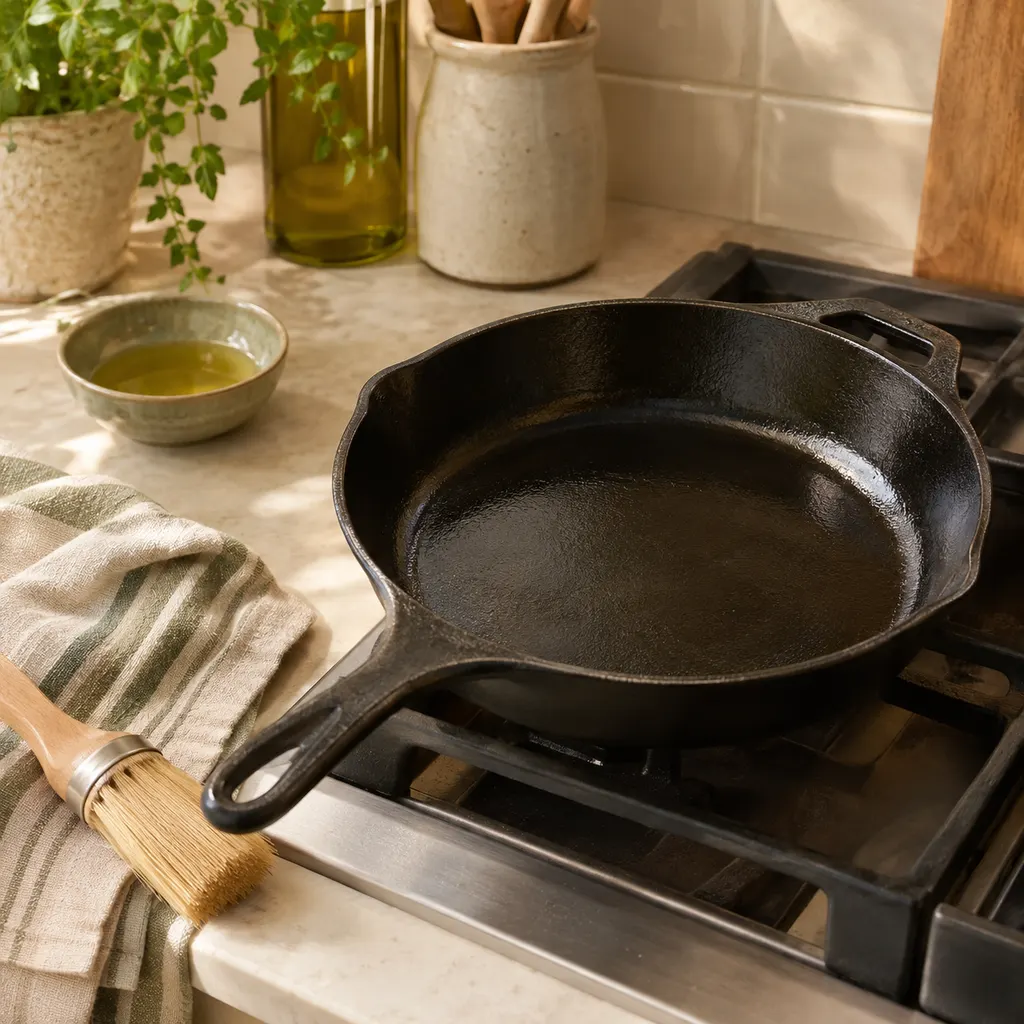
While the pan is still warm, rub a small amount of oil over the surfaces with a cloth or paper towel. Then wipe off as much as you can. Field Company recommends about a quarter teaspoon spread inside and out, then wiped back to a dry, matte finish (Field Company). If the pan looks wet or shiny with oil, you've left too much on. Excess oil turns tacky instead of forming a protective layer.
Field Company also points out that everyday liquid oils are fine if you use the pan daily, but they can go rancid over longer storage. For a week or more between uses, it suggests a more stable fat such as a saturated fat (Field Company). If your skillet only comes out on weekends, pick your oil with that in mind.
Soap, Salt and Scrubbers: Choosing the Right Amount of Force
The most useful habit is to escalate gradually. Start with the gentlest option and move up only if the residue doesn't come off.
| Tool or method | Best for | Trade-off |
|---|---|---|
| Paper towel or cloth wipe | Greasy pans with no stuck food | Won't shift anything stuck to the surface |
| Natural-fiber or nylon brush | Loose bits, everyday rinsing | Slow on hardened, caramelized residue |
| Plastic or wooden pan scraper | Thick stuck-on patches, flat areas | Doesn't reach well into corners |
| Chainmail scrubber | Egg residue, browned proteins, textured surfaces | Heavy pressure can wear thin seasoning |
| Coarse salt as an abrasive | Sticky or gummy spots, light surface rust | Takes elbow grease; rinse it all out |
| Small amount of dish soap | Strong odors, oily films water won't lift | Removes surface oil; re-oil afterward |
| Steel wool | Rust removal before re-seasoning | Removes seasoning; only for restoration |
The soap question
The old rule against soap dates from when soaps were made with harsher ingredients. Field Company says most modern dish soaps are safe as long as they don't contain polishing agents. Soap degreases the pan but doesn't strip bonded seasoning, so oil the pan well after a soapy wash (Field Company). Lodge also includes warm, soapy water in its restoration process, accepting that some seasoning may come off because the pan will be re-seasoned anyway (Lodge Cast Iron).
In practice, keep soap for times you need it: lingering smells after strongly flavored cooking, or a greasy film water won't shift. If your pan is new or the seasoning still looks patchy, take the more cautious approach MSU Extension recommends and use water and a towel (MSU Extension).
Using a chainmail scrubber well
Chainmail works best with light, quick strokes on a wet surface, the way you'd use a squeegee rather than sandpaper. Field Company suggests a sturdy brush first, then a chainmail scrubber, for residue from eggs or fatty proteins (Field Company). If you see bright grey metal coming through, ease off. That spot needs oil and some cooking time to rebuild.
Stuck-On and Burnt Residue
Burnt-on residue usually comes from sugary sauces, starchy batters or too little fat for the heat. Work through these steps in order.
- Loosen with warm water. Add a shallow layer of warm water to the pan and leave it for a few minutes. Don't leave it for hours. Field Company considers a few minutes' soak acceptable (Field Company).
- Scrape before you scrub. Push a flat scraper under the softened patch so it lifts off whole instead of being ground into the surface.
- Use coarse salt for what's left. Rub salt with a folded paper towel or a damp cloth over sticky leftovers. Salt is hard enough to remove residue but gentler than metal wool.
- Finish with the normal routine. Rinse, heat-dry and apply a thin coat of oil.
What about baking soda and vinegar?
Allrecipes describes a home method that covers stubborn bits with baking soda, adds a little vinegar, dilutes it with lukewarm water and leaves it before scrubbing gently (Allrecipes). We don't recommend combining cleaning agents here. One ingredient also needs caution on its own: vinegar is acidic, and acid attacks bare iron and thin seasoning. Even for rust removal, MSU Extension suggests vinegar contact of no more than 15 minutes at a time (MSU Extension). Scraping and salt clear most burnt residue without that risk, so try them first.
Avoid burnt residue in the first place
- Preheat gradually. Cast iron heats unevenly at first, and hot spots scorch food before the rest of the pan is ready.
- Make sure there's enough fat for what you're cooking. Lodge notes that heating cast iron with too little oil leaves the surface dull because the oil burns off (Lodge Cast Iron).
- Deal with the pan soon after cooking. Residue that cools and hardens overnight takes much more work.
Rust: Diagnosis and Recovery
Rust on cast iron looks alarming but is rarely the end of the pan. Field Company explains that iron reacts with oxygen when moisture is present to form iron oxide. It can be caused by a single drop of water, a pan that wasn't fully dried or warm, humid air (Field Company). Lodge says there's no need to throw away a rusty skillet (Lodge Cast Iron).
Light spots: spot-treat
For small orange patches, try the gentle options first. MSU Extension suggests that light rust can often be removed with a wet towel and kosher salt (MSU Extension). Field Company recommends moving to more abrasive tools only as needed, with fine steel wool as a last resort. After clearing the rust, dry the pan, warm it on low heat, wipe a small amount of fat into the spot until no sheen remains, and heat it again to set the fat (Field Company). Some rust may come back during the first drying. That's normal and usually goes away with another light scrub.
Widespread rust: strip and re-season
For a pan that's rusty all over, such as an inherited skillet or one found at a flea market, Lodge's restoration steps are:
- Scour the rusty areas with steel wool, then wash with warm, soapy water.
- Dry completely, using low stovetop heat to finish.
- Apply a very thin layer of cooking oil to every surface, thin enough that it doesn't run when the pan is tilted.
- Bake the pan upside down at 450–500°F for one hour, with foil on a lower rack to catch drips.
- Turn off the oven and let the pan cool inside so the seasoning can cure.
(Lodge Cast Iron)
MSU Extension describes a similar oven method at a lower 350°F and suggests repeating it three to four times (MSU Extension). The sources disagree on temperature, so follow the instructions from your pan's manufacturer if you have them. All of them agree on the key points: use very little oil, bake the pan upside down, and let it cool slowly.

Drying, Oiling and Storage Habits That Prevent Problems
Rust usually starts in the cupboard, not at the sink. A few storage habits do most of the work.
- Store it somewhere cool, dry and ventilated. Field Company notes that warm, humid air alone can start rust. It suggests keeping the pan on the stove so it's ready to use (Field Company).
- Avoid stacking, or protect the surface if you must. Prolonged weight and impacts can damage seasoning (Field Company). If space forces you to stack, put a dry cloth or paper towel between pans so they don't rub and moisture has somewhere to go.
- Store lids separately or ajar. A tight lid on a Dutch oven can trap humidity. Resting it slightly offset lets air circulate.
- Check pans you rarely use. A quick look every few weeks catches early rust spots while they're still easy to wipe off.
How often to re-season
If you cook with the pan regularly and dry and oil it each time, Field Company says it may never need a full oven re-seasoning (Field Company). Re-season only when you see a reason: patchy grey areas, rust, or food sticking where it didn't before.
Common Mistakes and How to Fix Them
Leaving the pan to soak
This is the most common way to rust a pan. MSU Extension advises never leaving cast iron submerged (MSU Extension). If you can't clean it right away, scrape out the food and leave the pan dry on the stove. Don't leave it in the sink.
The dishwasher
Lodge lists the dishwasher among the ways a well-seasoned pan ends up rusty (Lodge Cast Iron). The long exposure to water and harsh detergent removes the protective oil, and the pan sits wet afterward. Wash cast iron by hand only.
Air-drying in the rack
Even a short time on the drying rack can leave orange marks where water pooled. Towel-dry the pan right away, then finish it on low heat.
Using too much oil
A sticky, gummy surface means too much oil was applied or it wasn't heated long enough. Lodge's fix is to put the pan back in the oven for another hour, or until it's no longer sticky (Lodge Cast Iron). For daily oiling, keep wiping until the pan looks almost dry.
A dull, grey or burnt-looking surface
This usually means the pan was heated with too little oil and the existing film burned off. Lodge recommends re-seasoning, repeating if needed until the pan has a slight sheen (Lodge Cast Iron).
Scrubbing too hard every time
Steel wool and heavy chainmail pressure belong to restoration, not daily cleaning. If you're using them often, the cause is usually earlier: heat too high, too little fat, or residue left to harden. Fix those habits and cleanup gets easier.
Fitting Cast Iron Care Into Your Cooking Routine
Cast iron rewards regular use. Field Company puts it this way: the more you cook with the pan, the better it performs and the easier it is to maintain (Field Company). A few planning habits make that easier.
- Plan skillet-friendly meals close together. If you map out your week in the FoodEase meal planner, put dishes that suit cast iron on nearby days so the pan stays in use and keeps building seasoning, instead of drying out in a cupboard.
- Keep care supplies on your list. A worn brush or an empty oil bottle is easy to forget until you need it. Add replacements to your shopping list when you notice them running low.
- Time your drying and seasoning steps. The stovetop drying step and a one-hour oven cure are easy to lose track of. A kitchen timer from the FoodEase tools helps you avoid an over-heated empty pan or seasoning that's taken out too early.
- Choose dishes that suit the pan's condition. A newly re-seasoned skillet does well with fat-rich cooking that helps build its surface. When you browse recipes, you can save delicate or very sugary dishes for when the seasoning is well established.
If you're unsure whether a dish suits cast iron, you can ask Sue, the FoodEase cooking assistant, while you plan. For more practical guides on equipment care and kitchen organization, see the FoodEase kitchen journal.
In short: cleaning cast iron cookware should take a couple of minutes. Remove food with the gentlest tool that works, dry the pan completely, add a very thin film of oil and store it somewhere dry. The occasional bit of soap or rust is fixable, and a pan treated this way keeps getting better with use.
Common questions
What is the best cleaner for cast iron?
For most cleanups, hot water and a firm brush or chainmail scrubber are enough. A lightly used pan may only need a paper towel wipe. Coarse kosher salt works as a gentle abrasive on sticky spots. Field Company says modern dish soap without polishing agents is fine now and then. Whatever you use, finish by drying the pan completely and applying a thin layer of oil so the surface stays protected.
Can you use Dawn to clean a cast iron skillet?
A small amount of ordinary dish soap, including common brands like Dawn, is generally fine on seasoned cast iron. Field Company explains that modern soaps degrease the surface without stripping the seasoning. The catch is that soap removes the protective film of oil, so dry the pan thoroughly and re-oil it afterward. Some sources, including Mississippi State University Extension, still advise skipping soap, so use it only when water and a brush aren't enough.
Can vinegar and baking soda be used to clean cast iron pans?
Some home cooks use them on stubborn residue, and Allrecipes describes one such approach. Be careful with vinegar, though. It's acidic and can attack bare iron and thin seasoning. For rusted areas, Mississippi State University Extension suggests vinegar contact of no more than 15 minutes at a time, checking progress in between. Most of the time, scraping, salt and a chainmail scrubber do the job with less risk to the seasoning.
What are the benefits of cooking with cast iron?
Practically, cast iron holds heat steadily, works on the stovetop and in the oven, and resists sticking better as seasoning builds through regular cooking. It's also very durable. Rusted or neglected pans can usually be restored instead of replaced, which is why so many skillets get passed down. The trade-offs are the weight, slow heating and the need to dry and oil the pan after every wash.
Should I clean cast iron while it's still hot?
Warm is usually easiest: food lets go more readily and the pan dries faster. Use a dry, heavy oven mitt, and don't plunge a very hot pan into cold water, because sudden temperature changes stress the metal. Mississippi State University Extension suggests cleaning once the pan has cooled. Either approach works, as long as the pan doesn't sit dirty or wet for hours.
How do I know if I've ruined my cast iron?
Rust, dullness, sticky patches and flaking look alarming, but they're usually fixable. Lodge says a rusty pan can be scrubbed, dried, oiled and re-seasoned in the oven, and sticky seasoning usually just needs more time in the oven. A cracked pan, or one so warped it won't sit flat, is a different problem. Cleaning or re-seasoning can't fix that kind of damage.