
kitchen organization · small kitchens · countertop storage
Kitchen Counter Organization: A Zone-by-Zone Guide
Cluttered counters slow down every kitchen task. This guide shows how to size your prep space, decide what earns a spot on the counter, place appliances sensibly and keep surfaces clear with a short daily reset.
In this guide
- Start by Claiming One Clear Prep Area
- Decide What Earns a Spot on the Counter
- How to Arrange Appliances on Your Countertops
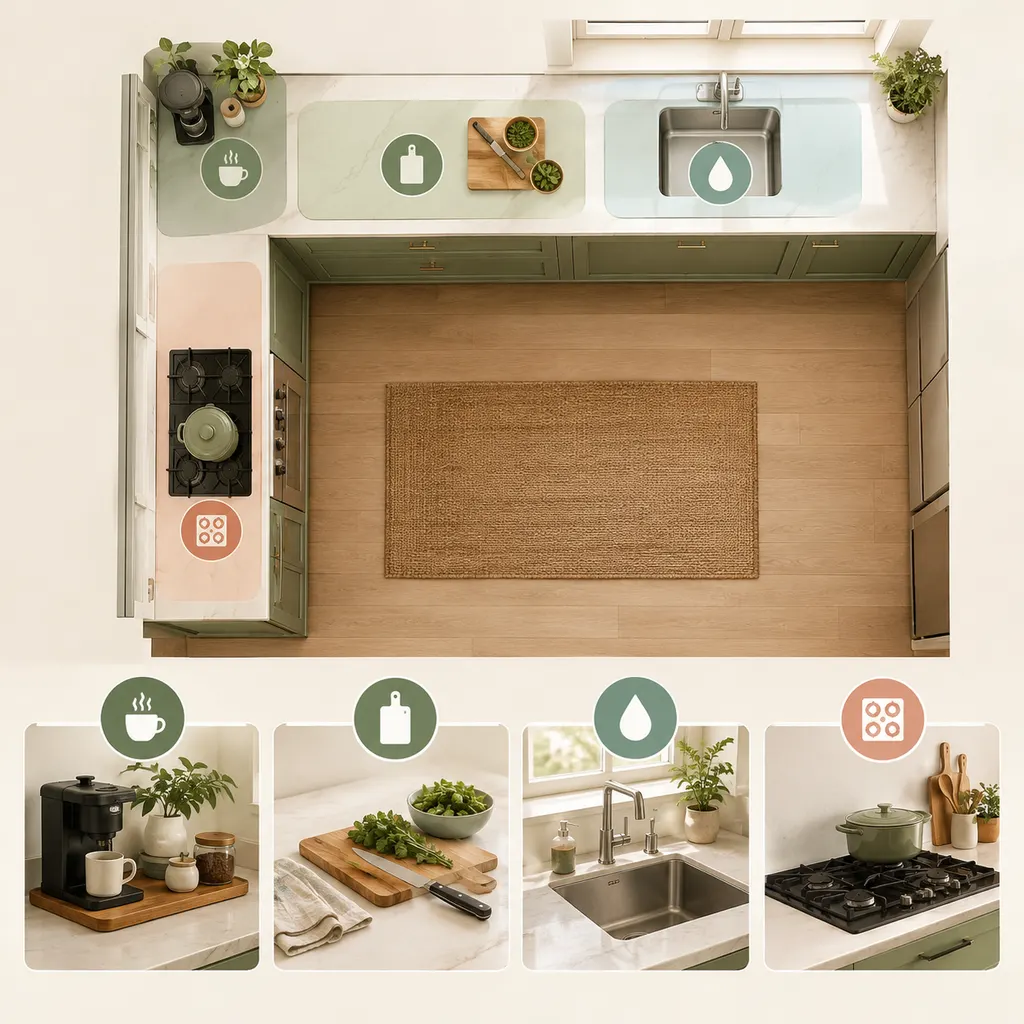
- Kitchen Counter Organization by Zone
- Use Vertical Space and Organizers That Make Tasks Easier
- Mistakes That Undo an Organized Counter
- Keep Counters Clear With a Daily Reset and Less Coming In
Kitchen counter organization is less about buying containers than about protecting the space where you actually cook. Most counters fill up slowly. A mail pile appears, a stand mixer never goes back in the cupboard, three oils gather by the stove and a fruit bowl drifts into the prep area. Each item seems reasonable on its own. Together they leave you chopping on a strip of counter barely wider than a cutting board, moving things aside before every task.
This guide works from function outward. First you claim a prep area. Then you decide what deserves to stay out, place those items in zones around the jobs they support, and only then choose organizers for whatever is left. It works for a small galley kitchen as well as a large one, because the questions are the same: what do you reach for every day, and where are you standing when you reach for it?
Start by Claiming One Clear Prep Area
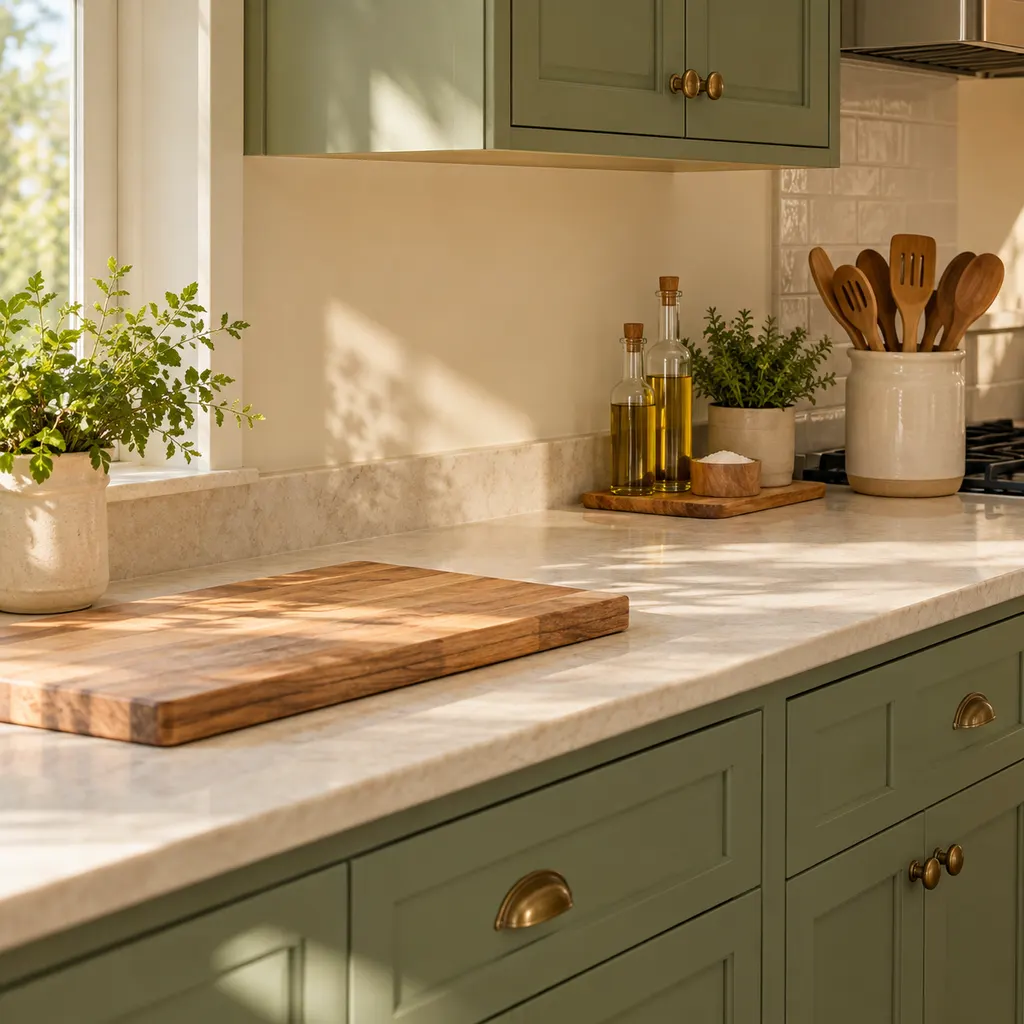
Before you move anything, pick the stretch of counter where you do most of your chopping, mixing and assembling. In many kitchens it sits between the sink and the stove, because food tends to go from washing to cutting to cooking. If your longest run of counter is somewhere else, use that. The point is to choose one area and treat it as off-limits for storage.
Size it to your biggest regular task
Lay your largest everyday cutting board on the counter. Leave enough room beside it for a bowl or sheet pan to hold what you've cut. That footprint is your minimum prep area. If you often roll out dough or set out several bowls at once, make it bigger. For the first week, mark the edges with a strip of painter's tape so you can see when things creep in.
Notice what keeps landing there
Whatever keeps landing in the prep area shows you where your system is failing:
- Mail and paperwork mean you need a drop spot outside the cooking zone.
- Groceries left out usually mean unpacking is awkward, often because the fridge or cupboard is too crowded to take them.
- A stray appliance means it has no easy home anywhere else.
- Dirty dishes point to a dish rack that's too small or a dishwasher that doesn't get emptied often enough.
Keeping everything off the counter doesn't always work either. A Bon Appétit commerce writer describes trying exactly that. Coffee supplies ended up in a messy pile in one corner, and they concluded the real fix was infrastructure such as shelves, baskets and containers that give each item a defined place. In short, a clear counter needs somewhere for things to go.
Decide What Earns a Spot on the Counter
Counter space is the most valuable storage in the kitchen because you don't have to open a door or drawer to reach it. That also makes it the easiest place to dump things. Sorting by how often you use something keeps the decisions honest.
For one week, notice what you actually touch every day. Then sort everything on the counter into tiers. A professional organizer writing for Better Homes & Gardens suggests leaving daily appliances like the coffee maker and toaster out, putting weekly-use items in base cabinets, and keeping rarely used ones higher up, for example above the refrigerator or microwave. The Spruce gives similar advice: most-used appliances stay visible, less-used ones go in a corner or upper cabinet, and seldom-used ones go in the pantry.
| How often you use it | Where it lives | Typical examples | Watch out for |
|---|---|---|---|
| Daily | On the counter, in its zone | Kettle, coffee maker, utensil crock, the oil and salt you cook with most | Keep this group small and give each item a fixed spot |
| Weekly | Base cabinets, low shelves or an appliance garage | Food processor, blender, mixing bowls | Heavy things belong low, not overhead |
| Monthly or less | Upper cabinets, pantry shelves, top of the fridge | Waffle iron, specialty pans, large serving platters | Keep a short list so you remember you own them |
| Not used in a year | Out of the kitchen | Duplicate gadgets, single-task tools you've replaced | Be honest about "someday" |
Weight matters as much as frequency. A heavy stand mixer you use every week may belong on the counter rather than in a high cabinet, because lifting it overhead is awkward and makes drops more likely. That's a fair exception, as long as it sits in a corner rather than in your prep area.
Look at duplicates too. Two cutting boards on the counter, three wooden spoons in the crock or a second set of measuring cups usually means one set could go into a drawer. A good rule: keep out the one you grab first, and store the backup.
How to Arrange Appliances on Your Countertops
Appliances take up the most counter space and are the hardest to move, so place them before anything else. A few principles help.
Put them in corners and at the edges
The deep inside corner of an L-shaped counter is hard to work in, because you can't comfortably reach across it. That makes it a good home for a coffee maker or kettle. The ends of a counter run also work well, since an appliance there won't split up your prep area.
Match each appliance to an outlet and its supplies
An appliance placed far from an outlet ends up with its cord trailing across the counter, which is both untidy and a hazard near water. Put the appliance close to an outlet and keep the things it needs within arm's reach. For a toaster, that might be a bread box and a butter knife. For a coffee maker, it's filters, beans and mugs.
Respect heat, steam and clearance
Kettles, toasters, rice cookers and countertop ovens give off heat or steam. Check each manual for the clearance it recommends from walls and upper cabinets, and follow it. Keep cords away from the sink, and don't squeeze appliances so close together that their vents are blocked.
Stack above, hide what you can
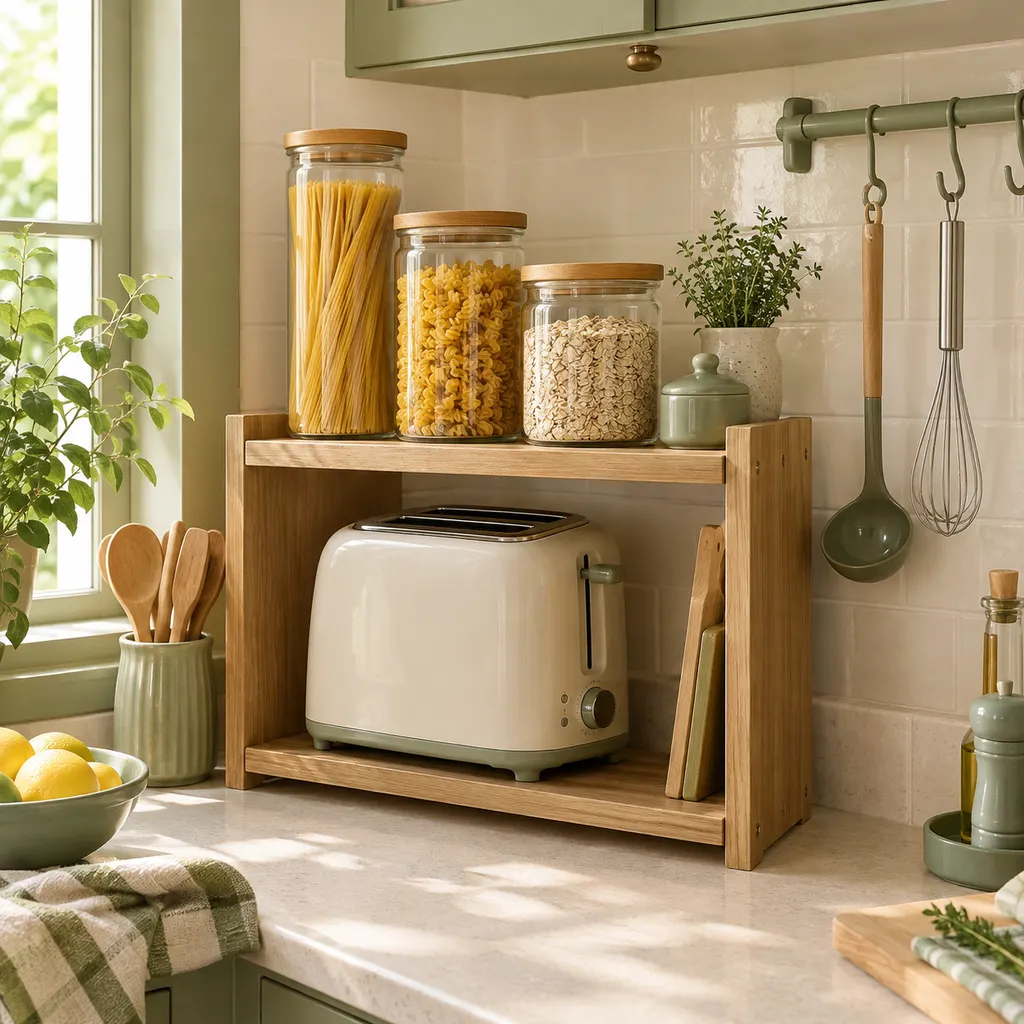
A countertop shelf can sit over an appliance and make use of the space above it. The Bon Appétit writer keeps a toaster under a stackable shelf with coffee supplies above it, which turns one footprint into two levels. If you have the cabinetry, an appliance garage keeps things hidden but easy to reach. Better Homes & Gardens suggests it for appliances you want out of sight between uses.
The most common appliance mistake is keeping one out "for now" in the middle of the counter. If it's out, it gets a permanent edge or corner spot. If it doesn't deserve a permanent spot, it goes into a cabinet.
Kitchen Counter Organization by Zone
Once your prep area is clear and the appliances are placed, group everything else by the task it supports. Zones cut down on walking back and forth, and they make it obvious where each item belongs when you tidy up.
Stove zone
Keep this zone to what you reach for while food is actually cooking: your main cooking oil, salt, pepper and a crock with a spatula, tongs and a wooden spoon. Better Homes & Gardens suggests putting a tray next to the stove for oil, vinegar and a salt cellar, plus a utensil crock if it fits. A tray helps because you can lift the whole group off the counter to wipe away splatter. The Spruce shows another option: a small lazy Susan holding oil, vinegar and salt near the stovetop, so you turn the item you need toward you instead of reaching past the others.
Keep the tray a little back from the burners so bottles don't sit right in the heat. Store backup bottles and rarely used spices in a cupboard. If a heavy skillet lives on the stovetop between uses, keep it dry and clean. Our guide to cleaning cast iron cookware explains how to do that without stripping the seasoning.
Sink zone
The sink zone holds dish soap, a brush or sponge, and the dish rack. Pick your dish rack based on how much you wash by hand:
- Roll-up or over-sink racks free up the most counter space but hold fewer items.
- Compact two-tier racks hold more and take up less width.
- Full-size racks only make sense if you hand-wash most of your dishes.
Whichever you use, set it so it drains toward the sink, and lift it out regularly to clean the counter underneath. Empty it every day. A dish rack that's never empty has quietly become a cupboard.
Coffee and tea zone
This is the easiest zone to get right because the routine is so consistent. Taste of Home suggests storing mugs in the cabinet directly above or below the coffee maker so you aren't crossing the kitchen for each cup. Put beans or tea, filters and sweetener on a tray or small riser next to the machine, and keep backup bags in the pantry.
Produce zone
Fruit and vegetables that don't need refrigeration can sit out, but keep them out of your cutting space. Better Homes & Gardens recommends a tiered basket because it takes up little surface area. Taste of Home notes that an open, tiered bowl allows airflow while using the same footprint. Leaving produce visible also helps cut waste. When ripe fruit sits in plain sight, you're more likely to use it before it turns. Put the item that needs eating first at the front, and avoid piling softer produce under heavier pieces.
Drop zone, away from the cooking
Mail, keys, receipts and chargers will end up somewhere. Give them a small tray or wall organizer at the edge of the kitchen, ideally near the door you use, so they stop landing on the prep area.
Use Vertical Space and Organizers That Make Tasks Easier
Only now is it worth choosing organizers, because you know what they need to hold and where. Each type has trade-offs.
| Organizer | Best for | Trade-off | What to check |
|---|---|---|---|
| Tray | Oils and salt by the stove, soap by the sink | It fills up if you don't set a limit | Raised edges and a wipeable surface |
| Stackable shelf or riser | Jars over an appliance, coffee supplies | Deep shelves hide what's at the back | Pieces that lock together firmly; height that clears the upper cabinets |
| Lazy Susan | Corners and groups of bottles | A round shape wastes the corners of a square space | A smooth, steady turn that doesn't wobble |
| Bread box | Bread and bagels | Takes up a fixed footprint | A flat top so it doubles as a shelf |
| Canisters | Dry goods you leave out, like oats or coffee | Refilling takes time and you lose the package details | Lids that seal well; a size that fits a full package |
| Wall rail, hooks or magnetic strip | Utensils, knives, towels | Needs installation, which may not suit rentals | Sturdy mounting that holds the full weight safely |
Notes on the main tools
Bon Appétit's guide says shelves should be sturdy, with pieces that lock together firmly. It also says a bread box does keep bread fresher, and one with a flat top can hold jars on top, so the footprint does double duty. The same guide suggests canisters can help dry goods keep longer when you leave them out on display. If you move food into canisters, cut out the cooking directions and best-by date and tape them to the back or bottom so you keep that information.
Wall storage is often the biggest win in a small kitchen. Better Homes & Gardens suggests a wall rack with S-hooks for utensils and a magnetic strip in place of a bulky knife block. The Spruce adds ideas such as open shelving and a rod on the wall. Mount anything that holds knives firmly, and leave enough space between blades to grab one handle without touching the next.
Run the convenience test
Before buying anything, picture using it mid-recipe with wet or oily hands. Taste of Home gives the example of a lidded cabinet for cooking oils that seems tidy until you have to open it every time you need a splash. If an organizer adds a step to something you do every day, it belongs in the cupboard, not on the counter.
Mistakes That Undo an Organized Counter
- Buying organizers before clearing out. A new riser filled with the same clutter is still clutter, just higher up. Sort by how often you use things first, then measure the gaps you actually need to fill.
- Letting organizers multiply. Five matching canisters, two trays and a basket can crowd a counter as badly as loose items. Limit each zone to one container system.
- Hiding everything. Taste of Home points out that the less you keep within reach, the more steps every task takes, and that items on a counter aren't automatically clutter if they're organized. Aim for less on the counter, not nothing.
- Storing things in the prep area. Even one jar or a phone stand in your cutting space shrinks it every day. Move it to the edge.
- Choosing materials that are hard to clean. Anything near the stove collects grease. Pick smooth, wipeable surfaces for that zone, and save woven baskets for dry, low-splash spots like the produce corner.
- Keeping too much decor. One plant or a cookbook stand is fine. A cluster of decorative pieces turns into something you have to move before you can cook.
Keep Counters Clear With a Daily Reset and Less Coming In
Any layout falls apart without upkeep. Two habits keep it working.
A five-minute reset each evening
After the last meal of the day, follow the same short order:
- Put every item back in its zone.
- Move anything that doesn't belong in the kitchen to the drop zone or its own room.
- Empty or tidy the dish rack.
- Wipe the prep area until it's completely clear.
The Spruce describes keeping counters completely clear between meals as the ultimate approach. Even if you leave a few daily items out, clearing the prep area every night means each cooking session starts with space to work.
Control what lands on the counter
A lot of counter clutter starts at the grocery store. Food you didn't plan for ends up on the counter because the cupboards have no room for it. Planning the week in the FoodEase meal planner and shopping from a shopping list makes it easier to buy only what you'll use. Fewer extras means less to store and less produce forgotten at the back of the basket. When you're browsing recipes, pick a few that use up what's already in your produce zone.
A phone or tablet showing a recipe tends to get propped wherever there's room, often in the prep area. Give it a fixed spot at the back edge of the counter, away from the sink. Keep measuring cups and timers in a drawer, and use the kitchen timers and converters instead of leaving extra gadgets on the counter. If you have a technique question mid-task, Sue, the FoodEase cooking assistant, can help without you pulling a reference book onto the counter.
Review the layout every season
Your routine changes over the year. A slow cooker that sat out all winter may be best stored in summer, and baking season may call for flour and sugar canisters within reach. Every few months, run the frequency test again and adjust. For more kitchen organization and equipment care guides, browse the FoodEase kitchen journal.
Common questions
How should I lay out my kitchen counters?
Start by marking off one clear prep area, usually between the sink and the stove. Then build zones around it. Cooking oils, salt and utensils go near the stove. Soap and the dish rack go by the sink. The coffee maker sits with its mugs and supplies. Produce goes somewhere it won't spread into your cutting space. Keep only the things you use every day on the counter, and give each one a fixed spot so the layout stays the same.
How do I arrange appliances on my countertops?
Leave appliances you use daily, like a coffee maker or toaster, on the counter near an outlet and the supplies they need. Corners suit them well because corners are awkward for prep anyway. Store appliances you use weekly in low cabinets, and rarely used ones higher up or in the pantry. Check each manual for clearance guidance, keep cords away from the sink, and never let an appliance sit permanently in your main prep area.
What is the best dish organizer for a countertop?
The best one fits your sink setup and how many dishes you wash by hand. A roll-up rack over the sink frees counter space but holds less. A compact two-tier rack holds more and takes up less width. A full-size rack only makes sense if you rarely use a dishwasher. Whatever you choose, it should drain toward the sink, come apart easily for cleaning, and get emptied every day so it doesn't become storage.
What is the 2026 trend for kitchen countertops?
The sources we used don't establish a single 2026 countertop trend, so we won't name one. What they do agree on is practical: keep fewer items out, use vertical space with shelves, rails and risers, group things by task, and choose organizers that match the rest of the kitchen. A layout that suits how you cook will outlast any styling trend.
How do I keep a small kitchen counter clutter-free?
In a small kitchen, every item left out has to earn its place. Move storage onto the walls with a rail, hooks or a magnetic knife strip. Use a tiered basket instead of a wide fruit bowl. Choose a bread box with a flat top so it doubles as a shelf. Most important, do a five-minute reset each evening: put everything back in its zone and leave the prep area completely empty.