
knife skills · kitchen basics · knife care
Knife Skills for Home Cooks: Grip, Cuts and Care
A practical guide to knife skills for home cooks. It covers how to hold the knife, protect your fingers, choose the right cut, steady round or slippery foods, practise without wasting food and keep your edges sharp.
In this guide
- Set Up Your Station Before You Pick Up the Knife
- Building Knife Skills From the Grip Up
- The Core Cuts and When Each One Earns Its Place
- Handling Round, Slippery and Awkward Foods
- How to Practise Knife Skills Without Wasting Food
- Keep the Edge Working: Honing, Sharpening and Cleaning
- Knife Safety Habits Worth Making Automatic
Good knife skills come down to a few habits you can repeat: a secure grip, a guiding hand that keeps your fingertips out of the way, a board that stays put and an edge that is actually sharp. Fast chopping and fancy cuts come later, and they come from practice far more than from buying a more expensive knife. This guide splits the skill into parts you can work on one at a time. It explains why each part matters and points out the mistakes that slow most home cooks down or put their fingers at risk.
Set Up Your Station Before You Pick Up the Knife
A lot of cutting trouble starts before the first cut: a board that slides, a crowded counter or the wrong knife for the job. Fix those first and everything after gets easier.
Choose a small set of knives you will actually use
You don't need a full block. The Auguste Escoffier School of Culinary Arts describes the main kitchen knives this way: a chef's knife for most chopping and slicing, a paring knife for peeling and small detailed work, a serrated knife for foods with a tough outside and soft inside such as bread and tomatoes, a narrow and flexible boning knife for taking meat and fish off the bone, and a utility knife that sits between the chef's and paring sizes. For most home cooks, a chef's knife, a paring knife and a serrated knife cover nearly every task.
When you choose a chef's knife, how it feels in your hand matters more than how it looks. Hold it the way you would to cut. The handle should fill your grip without cramping it, and the weight should feel easy to control rather than heavy at the tip or the handle. A blade length you feel confident with will serve you better than a longer one that makes you nervous.
Make the board stable
A board that shifts while you cut is a common cause of slips. Escoffier recommends laying a damp dish towel under the board to stop it sliding. A thin damp cloth or a rubber mat works the same way. Pick a board big enough that food doesn't spill over the edges. Wood and plastic boards are kinder to an edge than glass, stone or ceramic surfaces, which wear a blade down quickly.
Organize before you cut
Professional cooks call this mise en place, setting out everything before cooking starts. Hervé Malivert of the Institute of Culinary Education told Martha Stewart that it means each ingredient goes into the pan exactly when it's needed, so garlic doesn't burn while you're still slicing something else. For knife work, that means a clear area, a bowl for finished pieces and a separate bowl or container for trimmings. If counter space is tight, our guide to kitchen counter organization covers how to keep a working prep zone clear.
Building Knife Skills From the Grip Up
Most slow, tiring or unsafe cutting comes back to how the two hands work. One hand controls the blade. The other holds the food and guides the knife. Both need attention.
The pinch grip
Pinch the blade itself, just in front of the handle, between your thumb and the side of your index finger. Wrap your other three fingers loosely around the handle. This puts your control right at the blade, so small changes in angle reach the edge directly. Escoffier chef instructor Anthony Frazier describes the goal as a knife that feels like part of your arm, with the elbow, wrist and blade moving as one.
Common grip mistakes include:
- Holding only the handle, far back. The blade wobbles side to side and you push harder to make up for it.
- Squeezing hard. A tight grip tires your forearm and makes your motion jerky. Hold the knife firmly but not tensely.
- Resting your index finger on the spine for every cut. Some cooks like this for delicate slicing, but for chopping it usually gives you less sideways control than the pinch.
The claw hand
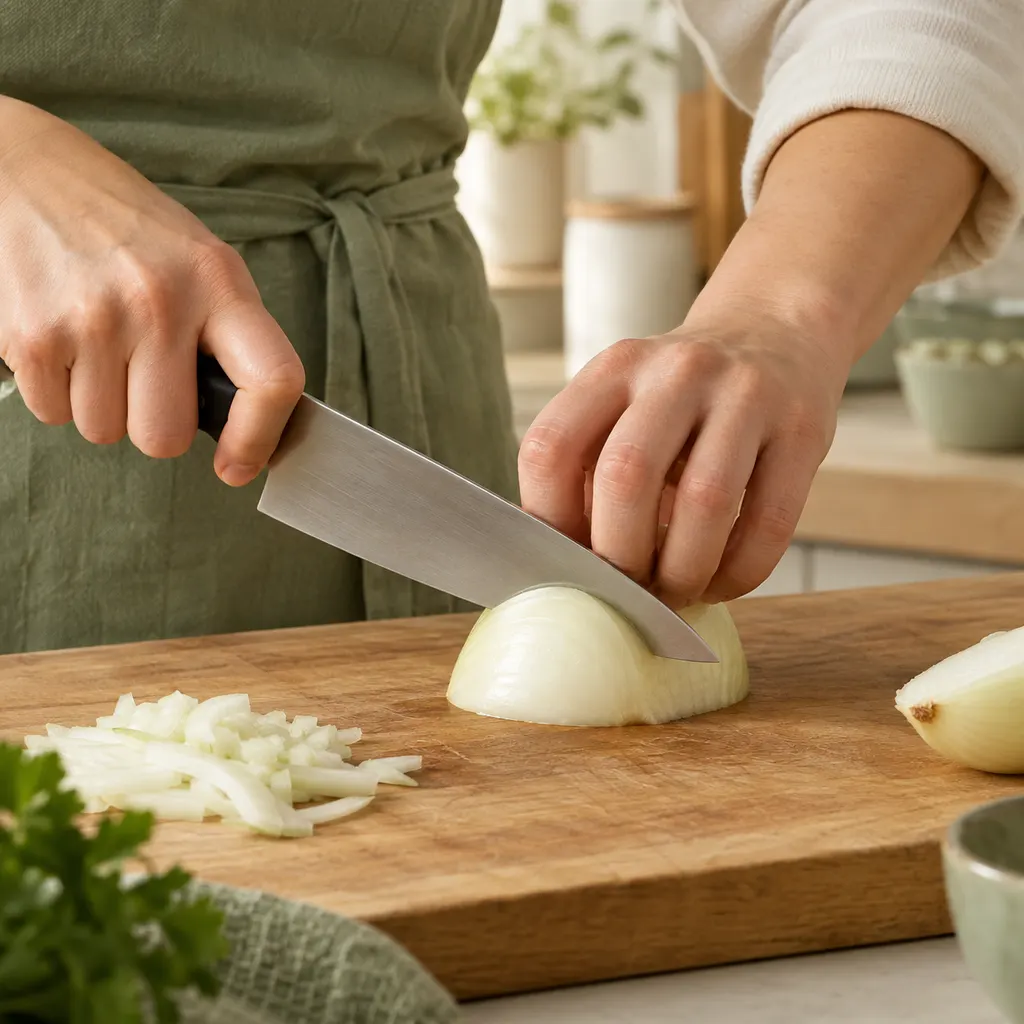
Your other hand does the protecting. As Escoffier's step-by-step guide explains, you curl your fingertips under so your knuckles sit slightly in front of them. The flat side of the blade rests against your knuckles as a guide, and your thumb stays tucked behind your fingers. As you cut, the claw walks back along the food so the blade always meets knuckle rather than fingertip.
The knuckle-guided blade is the main point. It sets the thickness of each slice: move the claw back a little and the slice is thin, move it back further and the slice is thicker. Most of the precision in skilled cutting comes from the guiding hand, not the knife hand.
Mistakes to watch for
- Fingers flattening out as you speed up, which puts the fingertips in front of the knuckles.
- The thumb sticking out to the side to steady a round item.
- Lifting the blade high above your knuckles, so it no longer touches them as a guide.
- Looking away mid-cut. Stop, put the knife down, then look.
The Core Cuts and When Each One Earns Its Place
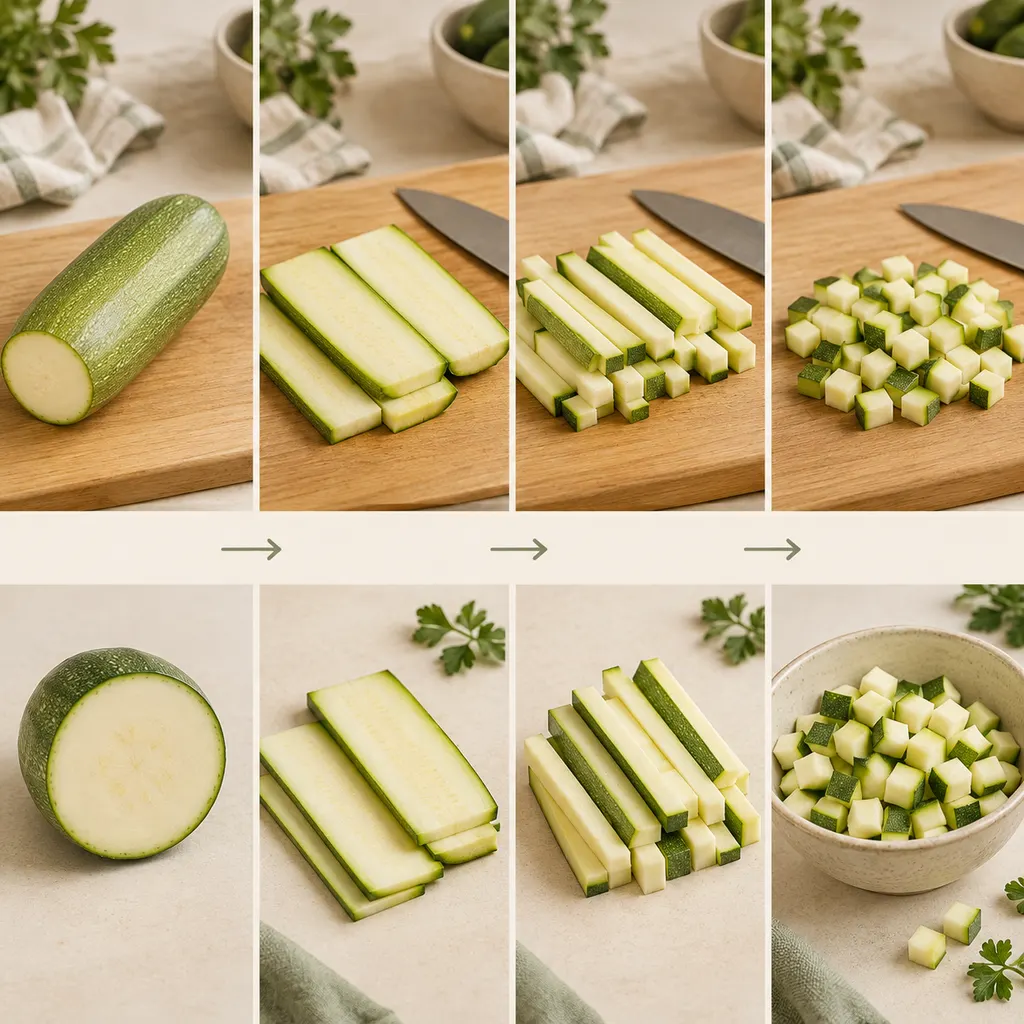
Most cuts are made from a few basic motions: a rocking motion, a straight up-and-down chop, and a forward slice where the blade travels forward as it goes down. Once those feel natural, the named cuts are mostly a question of what shape you're making. The table below shows the motion behind each common technique, what it suits and the usual mistake.
| Technique | Motion | Good for | Common mistake |
|---|---|---|---|
| Rock chop | Tip stays on the board while the heel rises and falls | Herbs, garlic, small pieces | Lifting the tip, which makes the motion choppy and less controlled |
| Cross chop | Free hand rests flat on the spine near the tip while the handle pivots back and forth | Fast mincing when looks don't matter | Curling fingers over the edge instead of keeping them flat on the spine |
| Straight chop | Up-and-down with even pressure, claw hand guiding | Larger, even pieces | Slamming the blade, which crushes soft foods and jars the wrist |
| Forward slice | Blade moves forward and down in one smooth stroke | Clean slices of firm vegetables, slicing meat | Pressing straight down without any forward motion |
| Dice | Planks, then sticks, then cubes | Even cubes that cook at the same rate | Skipping the flat base, so the food rolls |
| Julienne | Thin planks stacked and cut into matchsticks | Quick-cooking or raw dishes where texture matters | Stacking too high, so the pile shifts |
| Chiffonade | Leaves stacked, rolled tight and sliced thin | Basil and other broad leafy herbs | A dull edge that bruises the leaves instead of cutting them |
| Roll (oblique) cut | Angled cut, quarter turn, angled cut again | Long vegetables for braises and stir-fries | Rolling too far, so the pieces come out uneven |
Escoffier describes the rock chop as working well for herbs and garlic with little strain, and the cross chop as the faster option when the final look doesn't matter. The roll cut, which Escoffier lists among its more advanced techniques, exposes more surface area, which helps with browning and with soaking up a sauce. For leafy herbs, the Institute of Culinary Education keeps a knife skills library that includes chiffonade and herb-chopping demonstrations, which helps if you learn better by watching.
Why uniform size matters more than speed
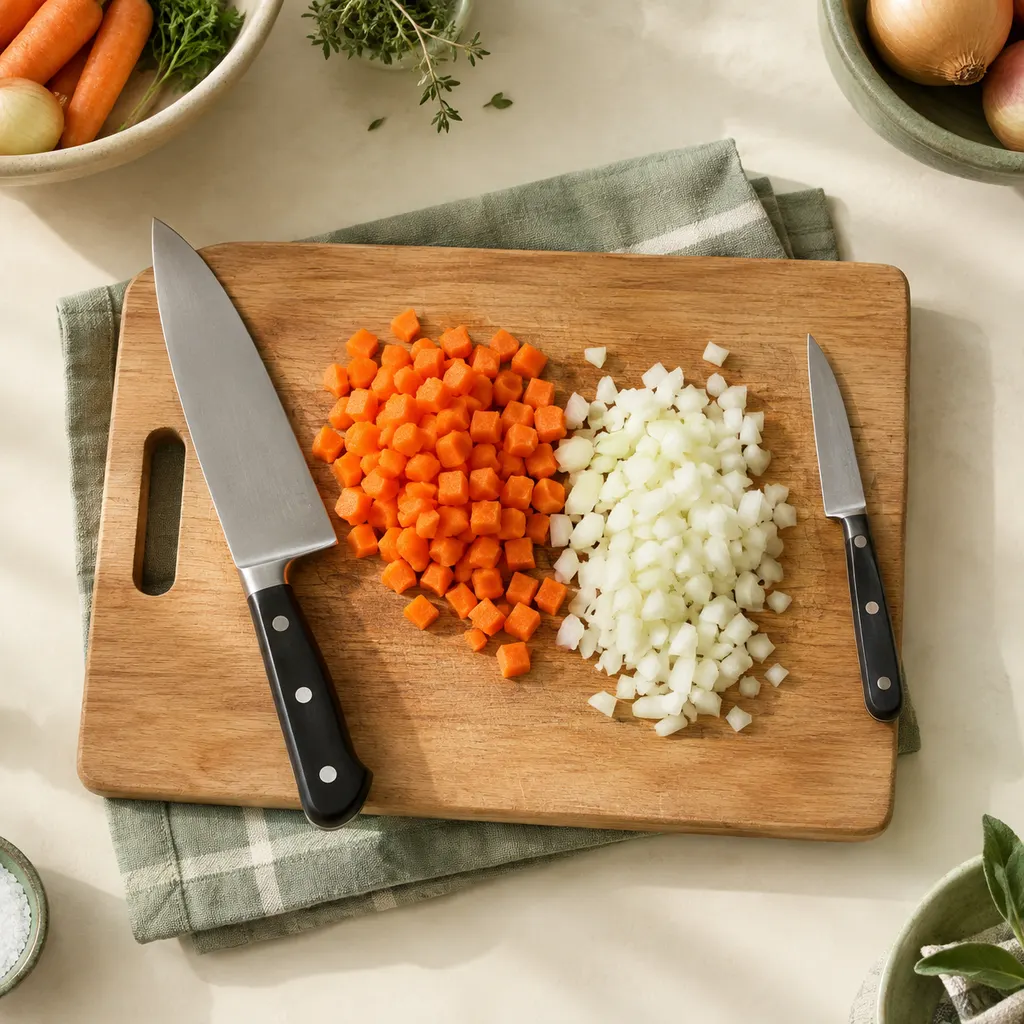
Escoffier points out that pieces of the same size cook evenly, so you're less likely to end up with some bits overcooked and others undercooked. This is the most practical reason to work on your cutting. When pieces in a batch match, they soften, brown and finish together. Aim for consistency within each batch. Exact dimensions matter much less at home than pieces that match each other.
Handling Round, Slippery and Awkward Foods
Many cuts happen when food rolls or slides under the blade. The fix is nearly always the same: give the food a flat, stable base before you try a precise cut.
Create a flat side first
For anything round, such as potatoes, carrots, squash or citrus, cut a thin slice off one side and set the food on that flat face. With long vegetables, halve them lengthwise and lay the cut sides down. This one habit turns an awkward, rolling item into something steady you can plank, stick and dice safely.
Onions
Better Homes & Gardens calls chopping an onion almost an art form of its own, separate from general knife skills, and one that takes practice. The key is the root end. Halve the onion through the root, peel it, and lay each half flat. Make your lengthwise cuts toward the root but stop just short of it, so the root keeps the layers together while you slice across. Keep your claw hand on the rounded top and work toward the root, then trim the root off and discard it at the end.
Herbs
Dry herbs well before you cut them. Wet leaves stick to the blade and clump together. Pull tender leaves off woody stems first. Use a sharp edge and make as few passes as you need, because going over the same pile again and again bruises the leaves into a damp mass instead of clean pieces.
Soft-skinned foods and pits
Tomatoes and similar foods are where a dull blade shows. A sharp chef's knife or a serrated knife with a light sawing motion breaks the skin without squashing the inside. Avocados need care: Better Homes & Gardens notes that it's easy to cut yourself removing the pit if you don't use the right technique. Keep the fruit on the board rather than in your palm while you halve it. If you're unsure, lift the pit out with a spoon rather than striking it with the blade while holding the avocado in your hand.
Raw meat and poultry
For trimming fat and sinew, Escoffier suggests a flexible boning knife held at a slight angle, taking care not to remove too much of the edible meat. When breaking down a whole bird, Better Homes & Gardens advises following the fat lines and the joints, letting the bird's structure guide the knife instead of forcing it through bone. Keep raw meat on its own board, away from produce. The same BHG guide lists avoiding cross-contamination among the basic food hygiene principles. When slicing cooked meat, cut across the visible muscle fibres rather than along them. The Institute of Culinary Education's knife skills collection includes a demonstration on finding the grain.
How to Practise Knife Skills Without Wasting Food
Bags of practice carrots usually end up in the bin. The better approach is to practise on food you were already going to cook and to choose meals that give you useful cutting work.
Plan practice into real meals
When you plan your week in the FoodEase meal planner, include a few dishes that need dicing, slicing or herb work. Aromatic bases are a good example. Malivert also told Martha Stewart that a classic mirepoix of onion, carrot and celery should be cut precisely, which makes it a useful everyday exercise in even dicing. You can browse FoodEase recipes for dishes that suit the cut you want to practise, then add the produce to your shopping list so you buy only what the plan needs.
Work on one element per session
- Grip and claw first. Cut slowly and watch only your hands. Ignore speed completely.
- Then consistency. After cutting, spread the pieces out and look for the odd sizes. Uneven pieces usually mean the claw moved back by different amounts.
- Then rhythm. Once the pieces match, let a steady pace build up on its own. Speed you force tends to undo the earlier habits.
Short, focused sessions work well. Setting a timer from the FoodEase kitchen tools for ten minutes of careful dicing helps you stay on technique rather than rushing to finish. If you get stuck on a technique while you cook, Sue, the FoodEase cooking assistant, can talk you through what to look for.
Cut to reduce waste
Escoffier lists less food waste among the benefits of good knife skills, and much of that comes from trimming. Take thin slices off ends, peel close to the surface and stop trimming when you reach usable flesh. Keep clean vegetable trimmings in a container as you work instead of sweeping them straight into the bin, so you can decide afterwards whether they're worth using. Prep only what your plan will actually use, rather than dicing a whole bag just in case.
Keep the Edge Working: Honing, Sharpening and Cleaning
A well-kept edge is part of the skill, not something separate from it. Escoffier notes that sharp knives are less likely to slip and need less force than dull ones, and Better Homes & Gardens puts it plainly: dull knives are more dangerous than sharp ones. A dull blade skids off skins and needs pressure, and pressure is what turns a small slip into a deep cut.
Honing versus sharpening
These are two different jobs. Honing realigns an edge that has bent slightly out of line with use, and it removes very little metal. Sharpening grinds away metal to form a new edge once the old one has worn down. Escoffier mentions both a honing steel and a sharpening stone for keeping knives sharp. In practice, hone often and sharpen less often.
| Method | What it does | Trade-offs |
|---|---|---|
| Honing rod (steel or ceramic) | Realigns an existing edge | Quick and easy to do often, but can't bring back a worn-out edge |
| Whetstone | Grinds a new edge | The most control and the best results once learned, but it takes practice to hold a steady angle |
| Pull-through sharpener | Grinds an edge at a fixed angle | Fast and simple, but the angle may not match your knife and it can remove more metal than needed |
| Professional service | Regrinds and refines the edge | Skilled results with no learning curve, but you're without the knife while it's away |
Whichever method you use, match the angle the edge was originally ground at. The maker usually lists it. Tools set to a very different angle can change the edge's shape over time.
How to tell when the edge needs attention
No fixed schedule suits every kitchen, so let the knife tell you. If it slides off tomato skin, crushes herbs, leaves onion slices joined together or needs extra pressure, try honing first. If honing no longer restores a clean cut, it's time to sharpen. Hold the edge up to a light: bright spots or glints along the cutting edge often show where it has rolled or flattened.
Cleaning and storage
Escoffier advises cleaning and drying knives right after use, both for hygiene and to prevent rust. Wash by hand and wipe from the spine toward the edge, never along the edge with your fingers. Never leave a knife in a sink full of soapy water, where nobody can see it. It's the same habit of drying straight away that protects other kitchen tools, as covered in our guide to cleaning cast iron cookware. Store knives in a block, on a magnetic strip or with edge guards. Loose in a drawer, the edges knock against other utensils and become a hazard when you reach in.
Knife Safety Habits Worth Making Automatic
Most knife injuries come from moments of distraction or improvisation rather than from difficult cuts. These habits reduce those moments:
- Give the cut your full attention. Escoffier stresses avoiding distractions. If you need to look away, stop and put the knife down first.
- Keep the board stable and the edge sharp. Together, these prevent most slips.
- Cut away from your body when you can, especially when trimming or peeling with a small knife.
- Never try to catch a falling knife. Step back and let it drop.
- Use the spine to move food. Scraping chopped food across the board with the edge dulls the blade and risks a slip. Turn the knife over and use the back.
- Put the knife down flat, edge facing away from you and away from the edge of the counter.
- Carry it point down at your side, and let others know when you're walking past them with a blade.
- Keep handles and hands dry. A wet, greasy handle can twist in your grip.
- Separate raw meat from ready-to-eat foods with different boards, or wash the board and knife thoroughly between tasks.
None of these habits takes long to learn, and together they make cutting feel calmer and more controlled. Pick one meal from your recipe collection this week with real knife work in it, focus on your grip and claw while you cut, and look over your pieces before they go into the pan. A few weeks of that kind of attention will do more for your cutting than any new knife.
Common questions
How do I get better knife skills?
Work on one habit at a time instead of trying to fix everything at once. Spend a few sessions on the pinch grip, then on the claw hand, then on making pieces the same size. Go slowly, because speed you force tends to be sloppy and unsafe. Practise on vegetables you were going to cook anyway, keep the edge sharp, and line up your finished pieces now and then to spot uneven cuts.
What are the most important knife safety rules?
Use a sharp knife on a board that can't slide, and keep your full attention on the cut. Curl your guiding fingers into a claw with the thumb tucked behind them. Cut away from your body when you can. Never try to catch a falling knife. Carry knives with the point down, and never leave one hidden in a sink full of water. Use separate boards for raw meat and for ready-to-eat foods.
Where should I use a boning knife?
A boning knife has a narrow, often flexible blade made for taking meat, poultry and fish off the bone. It also works well for trimming fat and sinew, because the thin blade can follow curves closely. Hold it at a slight angle and take off only what you need to, so you don't waste edible meat. For general chopping and slicing vegetables, a chef's knife is the better tool.
How often should I sharpen knives?
No single schedule fits every kitchen, because it depends on how often you cook, what you cut and what board you use. Let the knife tell you. If it slides off tomato skin, crushes herbs or needs extra pressure, try honing it first. If honing no longer brings back a clean cut, the edge has worn away and needs sharpening on a stone, with a sharpener or by a professional.
What are the basic knife skills every home cook should learn?
Most guides start with the grip and the claw hand, then build up to a few core cuts. Those are the rock chop for herbs and garlic, the straight chop for larger even pieces, slicing, dicing and mincing. After that you can add julienne, chiffonade for leafy herbs, and peeling and trimming. Once these feel natural, the roll cut and other decorative cuts are much easier to learn.